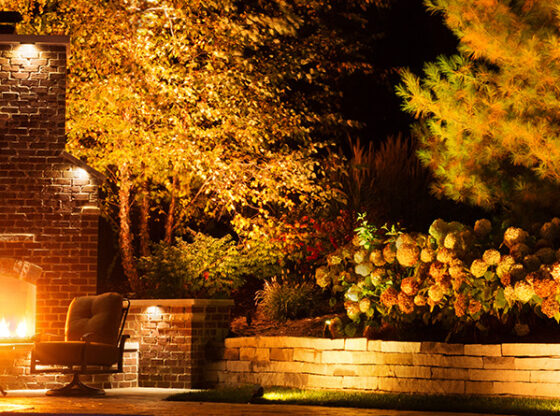
Are you new to lighting but really want to learn what fixtures/lamps to choose and where to install them? The best thing you can do is to install some lighting at your own home and really live with it. You’ll talk about it differently to your clients if you have firsthand experience. Coupled with that, consider more of the following tips and experiment to enhance your lighting skills.
Haven’t seen part one? Click here to read Can you Show Me How to Design Lighting? Pt1.
No matter what the budget is, you need a plan!
Lighting the Green
Shrubs: Shrub lighting can be a challenge and they generally aren’t that interesting even when lit. Options to light shrubs:
-path light(s) – may need to extend the stem by using a riser so that the path light hat sits higher above the shrub.
-small flood or wall wash – softly graze the sides of the shrub to add visual interest or fill in a dark gap within the landscape.
-down light from above with an accent fixture – if you have a structure or tree near a shrub/hedge, down lighting from above can add visual interest and help fill in dark areas as well as guide the eye through the space.
Ground Cover / Low Growing Flowers: generally position path light(s) inside areas with the most interesting plant materials, rocks, etc. You’ll need to determine the appropriate beam spread; some path lights have a three to four-foot spread, while others can go up to 16 feet. Selecting a path light that has a fully shielded hat is better and has less of a glare than a fixture with clear glass or a visible light source. Path lights are generally the most vulnerable fixtures due to their height, and they put out a one-dimensional, low-to-the-ground spread of light so it’s best to use them sparingly. Another way to illuminate ground level plant material is by down lighting it from trees and structures. You get much greater spread since you’re higher off the ground, and down lights are generally less vulnerable than path lights. Physiologically humans see vertical surfaces first, so where possible illuminating taller plant material, yard art, and structures is more appealing than illuminating the ground.
Lighting the Yard
Yard Art / Sculpture: Depending on the color and material of the art piece (light or dark color; metallic, wood, metal, plastic, shiny/satin/flat finish, etc.) you need to determine the best way to illuminate it. This will include deciding if it can be down lit or up lit, does it need a fixture “inside” of the art piece and what intensity should it be? You’ll need to decide the best Kelvin temperature (color of light) for the material you’re lighting. Warmer Kelvin temps (2200 – 2700K) tend to look better on warmer colored objects (red, orange, yellow, taupe, some whites, etc.), while cooler colored objects (blue, green, grey, bright white, black, metallic, etc.) look better with cooler light colors (3000 – 5000K). Keep the fixtures protected in a mulch bed, or use an in-grade fixture for turf areas.
Dormers / Cupola / Weather Vanes: The best way to illuminate architectural elements on a structure is to use a Gutter Mount Bracket. This special bracket screws into the fascia board and allows you to suspend a fixture over the top of a gutter. The wire is secured in place to the fascia board along the top lip of the gutter; do not leave wire in the gutter as it can act as a debris trap and cause a back-up. Run the wire to the ground adjacent to the down spout. Select the appropriate beam spread based on the distance between the fixture and the object. Accent fixtures work best for cupolas and weather vanes (3-4W or 4-6W LEDs), while small flood fixtures (2-4W bi-pin or wedge lamp) tend to work best for dormers. It depends on how far away from the gutter they are. You may find that a 10o or 35o beam for the accent fixture is best and doesn’t spread light too far; you may need frosted lenses to reduce the intensity. You’ll need to discuss with the homeowner regarding shining light into the dormer windows, and if that’s acceptable and what time the lights may need to turn off or if interior window treatments are sufficient.
Masonry / Wood Walls: There are several different ways to illuminate masonry/wood walls. They can be up lit from below with in-grade fixtures or accent lights (usually a wide beam spread is best but there are exceptions). They can be down lit from the top (of the wall itself) or from above (tree or structure). There are wall mount sconces and even up/down lights that mount in the middle or upper portions of the wall. The key consideration is how are you going to be able to run the wire so you can power these fixtures? Sometimes that dictates which style of fixture needs to be chosen.
Walkways: Paths can be illuminated in a few ways: path lights, down light from structures or trees, beacon fixtures (in-grade fixtures that sit about 1/2” to 1” above grade and shine light across a walkway (they are buried in the soil adjacent to the path), core-drilled in-grade mini lights that are installed inside the walkway material.
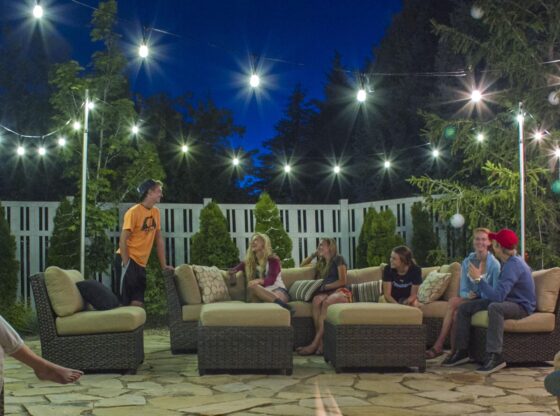
Deck/Patio: Can be illuminated with hardscape/railing/deck fixtures mounted under rails and capstones or on vertical surfaces (walls or posts). Can also down light from eaves using accent fixtures.
Steps: Can be illuminated with hardscape/railing/deck fixtures mounted under rails and capstones or on vertical surfaces (walls or posts). Can also down light from eaves using accent fixtures. Can also install core-drilled in-grade mini lights on each step.
Pergola: Down lights can be mounted to the structure at the top. Use caution in determining fixture location so light doesn’t hit people sitting below on top of the head. It’s a very uncomfortable feeling. Additionally, if there is a glass-top table under the pergola you may need to use a frosted lens on the down light to help soften any glare from the fixture on the glass. There are also outdoor-rated chandeliers and ceiling fans available if you want to incorporate that into the pergola. Lastly, you can install up/down lights on the posts to keep light around the perimeter of the pergola and use a single fixture to both up light into the structure as well as down light the deck/patio surface (usually install fixtures on four posts or every post – depends on shape and construction).
Water Feature: There are several ways to illuminate water features. If you have large boulders and plant material around the pond, try illuminating them from outside the water and just allowing it to reflect off the top of the water. This works best in bodies of water with smooth surfaces (not rapid current). Depending on the flow of water over a waterfall, you can place fixtures behind, in front of, or inside the fall. You get the most sparkle if you place fixtures where the water is most turbulent because there are more bubbles present. Placing fixtures in a niche or between rocks can also be a nice look. The key is to illuminate stones/plant material/water but minimize glare as much as possible. Position fixtures in and around the water while also keeping in mind the primary viewing angles so you don’t introduce a lot of light source glare.
Fire Pit: If there is a capstone with a lip around the top of the pit, then three to four hardscape fixtures can be placed underneath and illuminate the area surrounding the fire pit. If there isn’t a place to install hardscape fixtures, then consider core-drilled fixtures around the perimeter of the fire pit. These need to be small and have a very subtle lumen output since they are open-faced fixtures with little to no glare control. Lastly, if the fire pit is near a structure or tree, you can down light the area from above with an accent fixture.
Lighting design requires gathering many different factors to create a single cohesive look. No matter what you are lighting keep in mind the elements we discussed in both parts of this article.


