Are you new to lighting but really want to learn what fixtures/lamps to choose and where to install them? The best thing you can do is to install some lighting at your own home and really live with it. You’ll talk about it differently to your clients if you have firsthand experience. Coupled with that, consider the following tips and experiment to enhance your lighting skills.
No matter what the budget is, you need a plan!
Lighting the Facade
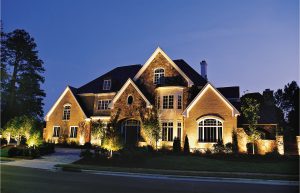 Are you lighting the front facade of the house? Are you lighting any of the front landscape? Are you up lighting or down lighting it, or both? Is there a walk way? Are you lighting trees in the backyard? Are you lighting a deck or a patio? Are there any steps? Is there a water feature or a fire pit? What will the homeowner enjoy the most? Illuminating the front of the home is mostly visible to neighbors and passersby (not really the occupants of the home). Illuminating the landscape (that they can see through the windows) and deck/patio will likely give the homeowners more enjoyment on a nightly basis. As long as you size the transformer correctly, you can easily phase in lighting zones over time. You can also use multiple transformers on the same property, but you need to work with an electrician to install 120V outlets where you need them.
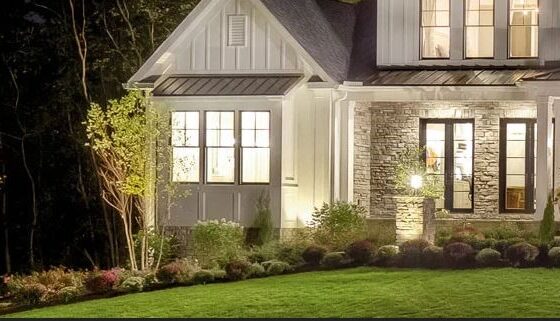
Front Facade (1 story house): use small or medium accent fixtures (generally 60o) or wall wash fixtures placed along wall(s) spaced evenly between each window. A small fixture would be about a 3W – 4W LED, and you can use a frosted lens if you need to soften or reduce the lumen output to achieve the right look. Fixtures should be within 8 to 12 inches of the wall, pointing vertically so that the “cone” of light that emits from the fixture(s) is grazing the facade. The color of the house can have an impact on the selection, too. Light colored facades will reflect more light than dark, so you’ll need to decide what look is appropriate. Homeowner’s don’t always know how to explain what they want, but you can show them photos or you can mock up a section to see what they like.
Front Façade (2 story house): use medium accent fixtures (generally 35o or 60o) placed along wall(s) spaced evenly between each window. A medium fixture would be about a 4W – 6W LED, and you can use a frosted lens if you need to soften or reduce the lumen output to achieve the right look. Fixtures should be within 8 to 12 inches of the wall, pointing vertically so that the “cone” of light that emits from the fixture(s) is grazing the facade.
Note: lighting should not encroach inside the windows to the interior of the home, and you want a softer, more cohesive illumination level across the facade, not a lot of harsh, overly bright “V”-shaped light cones that make the house look odd.
Lighting the House Details
Large/Wide Bay or Bow Windows (lower portion): up light on right and left sides of window (small or medium size fixtures), and if too dark under the window may want to install one to two small flood lights. These small floods usually take a 2W – 3W mini-lamp like a T3 Bi-pin or T5 Wedge. Make sure to position the fixture so that light doesn’t go inside the window. The light level under a large window should be a soft glow just to avoid a dark gap along the front façade. If there’s a tree or yard art in front of a large window, illuminate that instead because it gives you visual interest both outside and inside the home since you can see it from both directions.
Front Pillars: 35o or 60o accent fixture shooting straight up; graze front surface of each pillar. Depending on the height of the pillars, you can use a small (3-4W LED) or medium (4-6W LED) fixture. Capture the top roof line (above pillars) for added depth and dimension of architecture. It’s not recommended to use a 10o spot beam on pillars because they shoot light too far and put a harsh circle of light on the eave. You want an even spread of light across the eave to highlight the architecture across the entire façade.
Note: Trees require multiple fixtures to properly illuminate. Even the smallest of trees looks better when cross lit with at least two fixtures because you get more depth and dimension. It’s essential to illuminate the trunk (and not just the canopy) so that the tree doesn’t look like a floating head in the dark.
Lighting the Trees
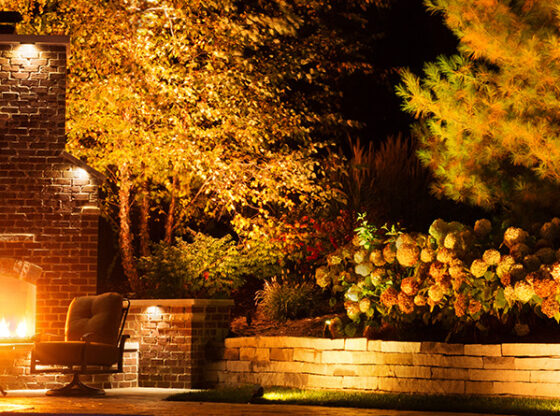
Large Trees: up light with medium and large accent fixtures. Medium: 4 – 6W LED; large: 6 – 10W LED (maybe higher depending on the size of the tree). Will need three to four fixtures (usually 60o) to up light the trunk; these are usually placed within 12-18” of the trunk and positioned vertically so the light grazes the bark. Add three to six fixtures (usually 35o) to up light into the canopy; these are usually placed several feet away from the trunk and positioned vertically so the light shoots up into the canopy.
It’s best to position the fixtures so that the center of the beam goes between the largest/lowest branches. This will allow the most intense light (“center beam”) to penetrate the canopy while the softer edges of the beam illuminate the surrounding branches. For very large trees, you may need to run wiring up the trunk (discrete path) and mount additional fixtures inside the canopy for areas that cannot be illuminated from the ground. You can do up or down lighting from within the canopy. Mounting fixtures to trees requires the use of special tree-mount junction boxes with hanger bolts; tree mounted fixtures need to be checked annually to make sure that the tree isn’t growing around the junction box.
Small Trees: up light with small (3-4W LED) or medium (4-6W LED) accent fixtures. You will need two to three fixtures (usually 60o) to up light the trunk; these are usually placed within 8 to 12” of the trunk and positioned vertically so the light grazes the bark. Add three to four fixtures (usually 35o or 60o) to up light into the canopy; these are usually placed a couple of feet away from the trunk and positioned vertically so the light shoots up into the canopy. It’s best to position the fixtures so that the center of the beam goes between the largest/lowest branches. This will allow the most intense light to penetrate the canopy while the softer edges of the beam illuminate the surrounding (lower) branches.
Note: Make sure fixtures are placed within a mulch bed. If it’s not possible to keep the fixtures safe inside a mulch bed, then you should consider an in-grade fixture that is flush to the ground and mow-over rated.
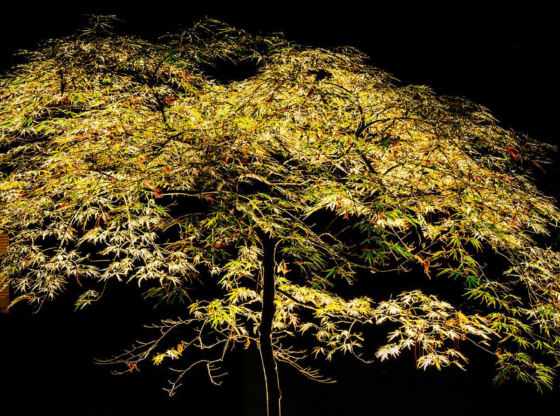
Multi-Trunked Trees (e.g. Service Berry): up light with small accent fixtures. Two is sufficient if it’s a small tree or if it only has 180o view. If it’s visible from 360o (or through a window to the house) then it’s generally better to have three fixtures spaced evenly around the tree. Position fixtures vertically and within 8 – 12” of the trunk and between main branches. Try to avoid intense “hot spots” on the lower branches; may need to use a frosted lens to soften. Some smaller trees (e.g. Japanese Maple) may be best illuminated using a small “square” flood light with a bi-pin or T5 lamp because it’s just softer and not as intense as a projection fixture (accent/ “bullet” light).
There is so much to think about when creating a lighting design. Read Can you Show Me How to Design Lighting? Pt2 here.


