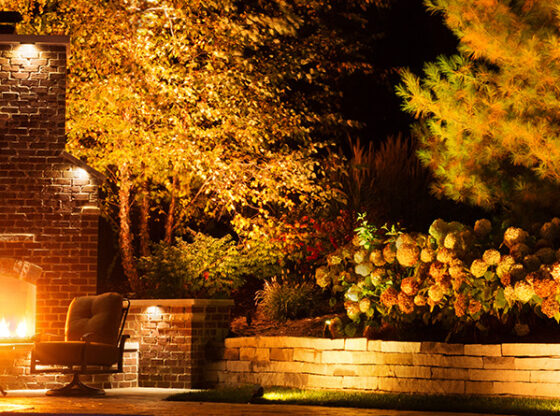
As many of you have already figured out, lighting is fun but it can take some experimenting to get the right amount of light just where you need it. That is doubly true when lighting trees and yard art/statues because no two are really alike. The best thing you can do is to install some lighting at your own home and really live with it. You’ll talk about it differently to your clients if you have first hand experience. Coupled with that, consider the following tips and test out new techniques to enhance the look of your upcoming lighting projects.
Large Trees
Up light with medium and large accent fixtures Medium: 4 – 8W LED; large: 9 – 14W LED (maybe higher depending on the size of the tree).
Three to four fixtures (usually 60o) will be needed to up light the trunk all the way around; these are usually placed within 12-18” of the trunk and positioned vertically so the light grazes the bark. If you only see part of the trunk or one side of the tree, then just illuminate that side of the trunk.
Add three to six fixtures (usually 35o) to up light into the canopy; these are usually placed several feet away from the trunk and positioned vertically so the light shoots up into the canopy. It’s best to position the fixtures so that the center of the beam goes between the largest/lowest branches.
This will allow the most intense light (“center beam”) to penetrate the canopy while the softer edges of the beam illuminate the surrounding branches. For very large trees, you may need to run wiring up the trunk (discrete path) and mount additional fixtures inside the canopy for areas that cannot be illuminated from the ground.
You can do up or down lighting from within the canopy, and really large/open trees can sometimes be completely illuminated top to bottom by fixtures that are mounted only in the tree itself (no ground mounted fixtures). Mounting fixtures to trees requires the use of special tree-mount junction boxes with hanger bolts; tree mounted fixtures need to be checked annually to make sure that the tree isn’t growing around the junction box.
One clever contractor invested in a drone and uses the camera to view his tree mount fixtures and whether they need to be serviced…all without ever leaving the ground unless he needs to.
Small Trees
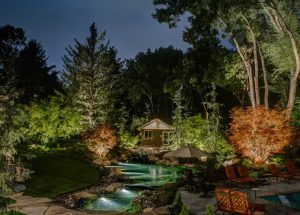 Up light with small (3-4W LED) or medium (4-6W LED) accent fixtures.
You will need two to three fixtures (usually 60o) to up light the trunk; these are usually placed within 8 to 12” of the trunk and positioned vertically so the light grazes the bark. Add three to four fixtures (usually 35o or 60o) to up light into the canopy. These are usually placed a couple of feet away from the trunk and positioned vertically so the light shoots up into the canopy.
It’s best to position the fixtures so that the center of the beam goes between the largest/lowest branches. This will allow the most intense light to penetrate the canopy while the softer edges of the beam illuminate the surrounding (lower) branches.
Note: Make sure fixtures are placed within a mulch bed. If it’s not possible to keep the fixtures safe inside a mulch bed, then you should consider an in-grade fixture that is flush to the ground and mow-over rated.
Small/Medium Multi-Trunked Trees (e.g. Service Berry, etc.)
Up light with small accent fixtures.
Two fixtures are sufficient if it’s a small tree or if it only has 180o view. If it’s visible from 360o (or through a window to the house) then it’s generally better to have three fixtures spaced evenly around the tree. Position fixtures vertically and within 8 – 12” of the trunk and between main branches. Try to avoid intense “hot spots” on the lower branches. You may need to use a frosted lenses to soften because many multi-trunked trees have branches that are very low to the ground.
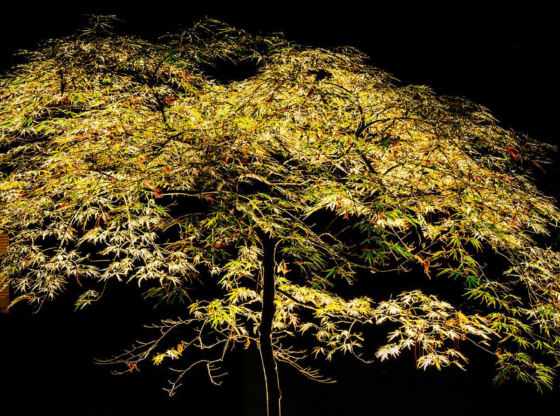
Some smaller trees (e.g. Japanese Maple) may be best illuminated using a small “square” flood light because it’s just softer and not as intense as a projection fixture (accent or “bullet” light). As mentioned above, it’s recommended to position fixtures so that the center beam shoots light into the canopy between two branches. This will allow the brightest part of the beam to penetrate higher into the canopy without creating an unsightly “hot spot” on the underside of a branch. If that’s unavoidable, then use a frosted lens or a dimmable fixture to help soften the light output.
Note: Trees require multiple fixtures to properly illuminate them. Even the smallest of trees looks better when cross lit with at least two fixtures because you get more depth and dimension. It’s essential to illuminate the trunk (and not just the canopy) so that the tree doesn’t look like a floating head in the dark.
Yard Art / Sculpture
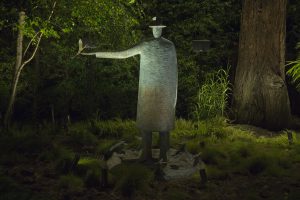 Depending on the color and material of the art piece (light or dark color; metallic, wood, metal, plastic, shiny/satin/flat finish, etc.) you need to determine the best way to illuminate it. This will include deciding if it can be down lit or up lit or both, does it need a fixture “inside” of the art piece and what intensity should it be?
You’ll need to decide the best Kelvin temperature (color of light) for the material you’re lighting. Warmer Kelvin temps (2200 – 2700K) tend to look better on warmer colored objects (red, orange, yellow, taupe, some whites, etc.), while cooler colored objects (blue, green, grey, bright white, black, metallic, etc.) look better with cooler light colors (3000 – 5000K).
Keep the fixtures protected in a mulch bed, or use an in-grade fixture for turf areas. It’s imperative to protect the fixtures (as well as the art work) and keep them positioned correctly. It helps if there is a mulch bed or hardscape area surrounding the sculpture and lighting.
Frequently you’ll find that multiple fixtures are needed to properly illuminate yard art. Sometimes you’ll need to add some additional light away from the art piece just to soften any harsh/weird shadows that may be created by lighting the art work. Sometimes just shifting a fixture can fix/reduce awkward shadows. It comes down to experimenting not only with types of fixtures but also light intensity as well.
One of the best ways to illuminate yard art of any sort is to do a mock-up and get the client involved. Once you’ve prepped the mock-up, have the homeowner come out and review it with you to see if they want to change anything. Most will enjoy the process, and you’ll know before you finish the full installation that you have their buy-in on a special part of the job.
The best thing is to have fun with it. Experiment and try different fixtures and lighting techniques. You may find something totally unexpected and be thrilled with the results.


